2.6 useScroll & useFullscreen
useScroll
user가 scroll하여 무언가 지나쳤을 때, 색상을 바꾸는 등 무엇이든 할 수 있다.
const useScroll = () => {
const [state, setState] = useState({
x: 0,
y: 0
});
const onScroll = () => {
setState({ y: window.scrollY, x: window.scrollX });
};
useEffect(() => {
window.addEventListener("scroll", onScroll);
return () => window.removeEventListener("scroll", onScroll);
}, []);
return state;
};
const App = () => {
const { y } = useScroll();
return (
<div className="App" style={{ height: "1000vh" }}>
<h1 style={{ position: "fixed", color: y > 100 ? "red" : "blue" }}>HI</h1>
</div>
);
};⭐ Remember!!
eventListener를 추가했다면, 같은 이름(event)과 같은 handler로 지워줘야 한다!
window.addEventListener("scroll",onScroll);
return () => window.removeEventListener("scroll", onScroll);
useFullscreen
: fullscreen으로 보여준다.
WEIRD!
fullscreeen을 request할 때는 element.current를 통하지만, exit할 때는 document를 통해 빠져나온다.
const useFullscreen = () => {
const element = useRef();
const triggerFull = () => {
if (element.current) {
element.current.requestFullscreen();
}
};
const exitFull = () => {
document.exitFullscreen();
};
return { element, triggerFull, exitFull };
};
const App = () => {
const { element, triggerFull, exitFull } = useFullscreen();
return (
<div className="App" style={{ height: "100vh" }}>
<div ref={element}>
<button onClick={exitFull}>Exit fullscreen</button>
<img
src="https://i.pinimg.com/736x/69/8c/d8/698cd8a0873a366611d95ea3ccf82cb9.jpg"
style={{ width: "100px" }}
/>
</div>
<button onClick={triggerFull}>Make fullscreen</button>
</div>
);
};
callBack을 사용하여 구현할 수도 있다.
const useFullscreen = (callback) => {
const element = useRef();
const triggerFull = () => {
if (element.current) {
element.current.requestFullscreen();
if (callback && typeof callback === "function") {
callback(true);
}
}
};
const exitFull = () => {
document.exitFullscreen();
if (callback && typeof callback === "function") {
callback(false);
}
};
return { element, triggerFull, exitFull };
};
const App = () => {
const onFulls = (isFull) => {
console.log(isFull ? "We are full" : "We are small");
};
const { element, triggerFull, exitFull } = useFullscreen(onFulls);
return (
<div className="App" style={{ height: "100vh" }}>
<div ref={element}>
<button onClick={exitFull}>Exit fullscreen</button>
<img
src="https://i.pinimg.com/736x/69/8c/d8/698cd8a0873a366611d95ea3ccf82cb9.jpg"
style={{ width: "100px" }}
/>
</div>
<button onClick={triggerFull}>Make fullscreen</button>
</div>
);
};- callback을 passing
- 사람들에게 state를 알려줌
- API를 확장시켜 사람이 언제 작게 크게 만들지 결정
- event에 어떻게 반응할 지 결정
- 모든 element를 가져와 Full screen으로 만들 수 있다.
브라우저에 따라 fullScreen function이 다를 수 있다.
+ callback함수의 중복되는 검사를 function으로.
const useFullscreen = (callback) => {
const element = useRef();
const runCb = (isFull) => {
if (callback && typeof callback === "function") {
callback(isFull);
}
};
const triggerFull = () => {
if (element.current) {
if (element.current.requestFullscreen) {
element.current.requestFullscreen();
} else if (element.current.mozRequestFullScreen) {
element.current.mozRequestFullScreen();
} else if (element.current.webkitRequestFullScreen) {
element.current.webkitRequestFullScreen();
} else if (element.current.msRequestFullScreen) {
element.current.msRequestFullScreen();
}
}
runCb(true);
};
const exitFull = () => {
document.exitFullscreen();
if (document.exitFullscreen) {
document.exitFullscreen();
} else if (document.mozCancelFullScreen) {
document.mozCancelFullScreen();
} else if (document.webkitExitFullScreen) {
document.webkitExitFullScreen();
} else if (document.msExitFullScreen) {
document.msExitFullScreen();
}
runCb(false);
};
return { element, triggerFull, exitFull };
};2.7 useNotification
useNotification
: notification(알림)을 실행하는 function
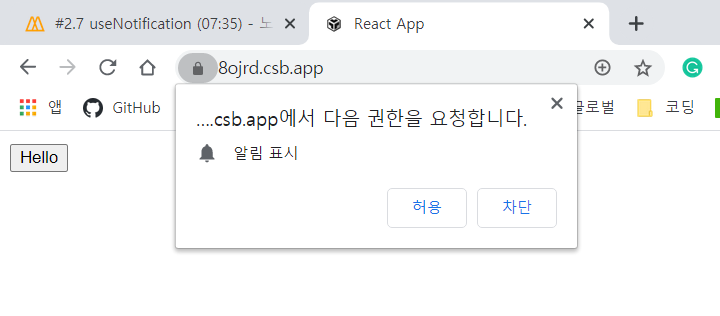
like) 구글 크롬의 알람
permission을 요청
Notification.permission
- denied
- granted
- default: 모든 알람 허용X -> denied처럼 행동할 것
const useNotification = (title, options) => {
if (!("Notification" in window)) {
return;
}
const fireNotif = () => {
if (Notification.permission !== "granted") {
Notification.requestPermission().then((permission) => {
if (permission === "granted") {
new Notification(title, options);
} else {
return;
}
});
} else {
new Notification(title, options);
}
};
return fireNotif;
};
const App = () => {
const triggerNotif = useNotification("Can I steal your kimchi?", {
body: "I love kimchi don't you?"
});
return (
<div className="App">
<button onClick={triggerNotif}>Hello</button>
</div>
);
};
requestPermission은 단 한번만 발생한다.
user들에게 한 번 물어봤을 때, 그들이 "denied"하면 다시 물어볼 방법이 없다.
hooks은 아니지만 사랑💜스러운 functional programming이다!
2.8 useAxios
Axios
: HTTP request를 만드는 것
Axios는 약간의 customization과 configuration을 허용한다.
axios는 instance를 만드는 것을 허용하고, configuration하여 header와 함께 전달할 수 있다.
예) axios는 default URL을 설정하거나 automatic Header를 설정하는 것을 허용한다.
useAxios
axios instance를 얻지 못하면, import한 defaultAxios를 전달한다.
import React, { useState, useEffect, useRef } from "react";
import ReactDOM from "react-dom";
import useAxios from "./useAxios";
const App = () => {
const { loading, data, error } = useAxios({
url: "https://yts-proxy.now.sh/list_movies.json"
});
console.log(
`Loading: ${loading}\nError:${error}\nData:${JSON.stringify(data)}`
);
return (
<div className="App">
<h1>hello</h1>
</div>
);
};
const rootElement = document.getElementById("root");
ReactDOM.render(<App />, rootElement);import defaultAxios from "axios";
import { useEffect, useState } from "react";
const useAxios = (opts, axiosInstance = defaultAxios) => {
const [state, setState] = useState({
loading: true,
error: null,
data: null
});
if (!opts.url) {
return;
}
useEffect(() => {
axiosInstance(opts)
.then((data) => {
setState({
...state,
loading: false,
data
});
})
.catch((error) => {
setState({ ...state, loading: false, error });
});
}, []);
return state;
};
export default useAxios;- then(data => { });
error가 없다면 then에서 data를 얻는다.
- catch(error => { });
error가 있다면 catch해준다.
refetching(다시 가져오기)
: trigger를 솎여 refetch : useEffect를 다시 하게 만든다.
-> dependency를 추가!
import React, { useState, useEffect, useRef } from "react";
import ReactDOM from "react-dom";
import useAxios from "./useAxios";
const App = () => {
const { loading, data, error, refetch } = useAxios({
url: "https://yts-proxy.now.sh/list_movies.json"
});
console.log(
`Loading: ${loading}\nError:${error}\nData:${JSON.stringify(data)}`
);
return (
<div className="App">
<h1>{data && data.status}</h1>
<h2>{loading && "Loading"}</h2>
<button onClick={refetch}>Refetch</button>
</div>
);
};
const rootElement = document.getElementById("root");
ReactDOM.render(<App />, rootElement);import defaultAxios from "axios";
import { useEffect, useState } from "react";
const useAxios = (opts, axiosInstance = defaultAxios) => {
const [state, setState] = useState({
loading: true,
error: null,
data: null
});
const [trigger, setTrigger] = useState(0);
if (!opts.url) {
return;
}
const refetch = () => {
setState({
...state,
loading: true
});
setTrigger(Date.now());
};
useEffect(() => {
axiosInstance(opts)
.then((data) => {
setState({
...state,
loading: false,
data
});
})
.catch((error) => {
setState({ ...state, loading: false, error });
});
}, [trigger]);
return { ...state, refetch };
};
export default useAxios;2.9 Conclusions
2.10 Publishing to NPM
직접 만든 hooks을 NPM에 publish하는 방법
이건 그냥 필요하면 영상 다시 보자.
nomadcoders.co/react-hooks-introduction/lectures/1603
All Courses – 노마드 코더 Nomad Coders
초급부터 고급까지! 니꼬쌤과 함께 풀스택으로 성장하세요!
nomadcoders.co
깃헙에 openSource올리는 것 같은 느낌이다.
생각보다 되게 간단하네.
publish할 때는 Readme도 상세하게 작성한다.
2.11 What to learn next
hooks를 더 이해하고 싶다면
useContext
Reducer
Callack
Memo
에 집중해라!
'💻 Study > 웹' 카테고리의 다른 글
| [Node.js] GET과 POST의 차이는 무엇일까? (0) | 2021.12.08 |
|---|---|
| [Javascript] '==' 와 '===' 뭐가 다를까? (0) | 2021.02.24 |
| #2-1 USEEFFECT (0) | 2021.01.12 |
| #1 USESTATE (0) | 2021.01.12 |
| #0 INTRODUCTION - 리액트 Hooks (0) | 2021.01.10 |